

DIY Resin Lamp for Fall: Cozy Light, Handmade Magic
Scroll
There's something about fall light - it's softer, warmer, and carries that golden-hour feeling all day long. And while candles and string lights might get all the attention this season, nothing sets the mood like creating your very own DIY resin lamp. Handmade, personal, and glowing with autumn energy, this project blends nature, creativity, and epoxy into a one-of-a-kind piece for your home.
In this project, Erika from Betty Moon Studios used Promise Epoxy Deep Pour and Fast Cure Resin to craft a floral resin lamp that's equal parts cozy and striking. Here's how the process came together - and what she learned along the way.
Materials You'll Need
Before diving into the process, here's what you'll want on hand:
- Deep Pour Epoxy (40 oz per panel)
- Fast Cure Resin (for flower adhesion and assembly)
- 10" x 10" square mold
- Dried flowers (pressed in silica gel)
- Alcohol inks for tinting (orange, black, white)
- Sandpaper (80-600 grit)
- Cutting guide and saw
- Lighting insert or candle
1. Flower Prep
Every fall lamp needs a little nature. Erika began by drying flowers in silica gel for three weeks. Once dried, each bloom was gently cleaned to remove any residue, leaving behind perfectly preserved petals ready to shine in resin.
2. Mold & Design
With a 10" x 10" square mold, the floral arrangement begins to take shape. To keep everything in place, a thin layer of Fast Cure Resin was poured over the design. This quick cure locked the flowers exactly where they belonged, making sure they wouldn't shift during the deep pour.

3. Mixing Color for Fall Vibes
For the resin base, 40oz of Deep Pour Epoxy was measured and tinted. The color palette? A translucent mix of orange, white, and just a touch of black - coming together in a smoky pink tone that felt both spooky and warm.
Lesson Learned: Adding mica powder at the end caused clumping and sinking. Stick to alcohol inks for a smooth, even finish.


4. Bubble-Free First Pour
The mixed resin was vacuum-sealed to remove air bubbles, then poured into the mold over the flowers. After a 72-hour cure, the first glowing panel was ready to be revealed.

5. Second Panel for Balance
Consistency is key when creating a lamp (and working with epoxy in general). By carefully writing down the tint ratios, Erika poured a second 10" x 10" panel that perfectly matched the first.


6. Cutting Panels to Size
Each large panel was cut in half, creating four smaller slabs measuring 5" x 10". A cutting guide would have made this step smoother (and reduced sanding later), but the final pieces still came together beautifully!
7. Assembly With Epoxy
The four panels were joined at the corners using Fast Cure Resin. Any small gaps were filled with resin, creating seamless edges and a clean cube shape.
8. Sanding & Finishing Touches
To achieve that soft, professional glow, sanding started at 80-grit and worked up to 600-grit. A divot was carved into the base to allow room for a lamp cord, keeping the lamp flat and functional.
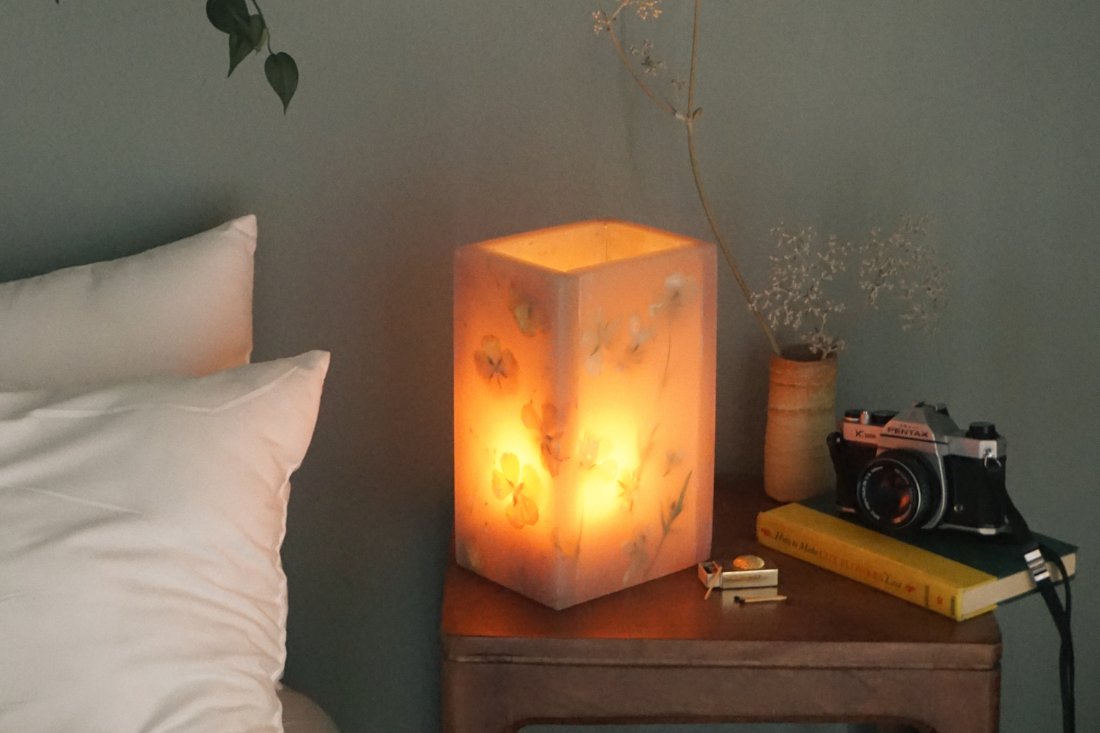
9. Light It Up
This lamp was designed with flexibility in mind:
- Pop in a candle for that flickering, autumn-cozy feel.
- Or pair it with a lamp base and warm bulb for steady, room-filling light.

Takeaways for Next Time
Like every DIY project, this lamp came with a few lessons learned:
- Skip mica powders - they can clump and stick.
- Use a cutting guide for straighter slabs.
- Trying placing flowers face-down in the mold for a cleaner look.
- Apply a thicker layer of Fast Cure Resin when adhering the flowers - sanding can sometimes eat into delicate petals.
Why This Lamp Feels Like Fall
What makes this lamp so perfect for autumn isn't just the warm tones or the preserved flowers - it's the handmade energy behind it. Epoxy gives you the ability to lock a season in place, to hold onto things you love about fall, and to literally light them up in your home.
So grab your dried blooms, mix up some Promise Epoxy, and make a lamp that glows as warmly as the season!